 |
 |
|
|
|
 |
 |
|
|
|
PARTS:
1 - 12 oz. aluminum soda can;
2 - 5.5oz. aluminum juice (V8 or Libby's All Nectar work good) cans;
J-B Weld (about $7 at an auto parts or hardware store, but there is
enough for a lot of stoves).
TOOLS:
felt tip pen;
piece of paper;
3/16" drill bit;
drill capable of extremely slow speeds (I use a rechargeable 9.6 volt);
paper punch (optional, can use drill bit)
sandpaper and/or wire brush;
scissors;
sewing needle (the one that I use measures 0.02", I started with a
smaller needle and worked my way larger until I got the size of flames
I wanted);
toothpicks (flat ones work better than round);
razor blade;
DIRECTIONS:
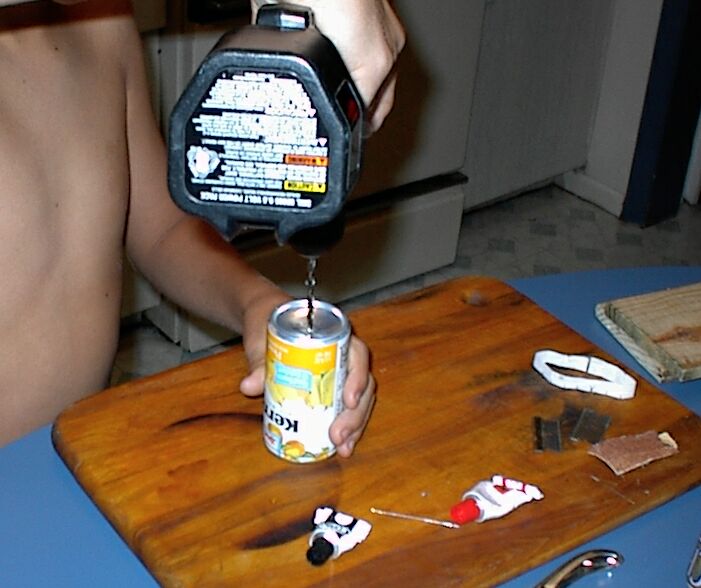
Drill and de-burr a 3/16" hole in the bottom center of the soda can,
this is only a vent to avoid pressure build-up in the stove base.
Drill and de-burr a 3/16" hole in the bottom of one juice can as close
to the center as possible, this will be your fuel filler hole.
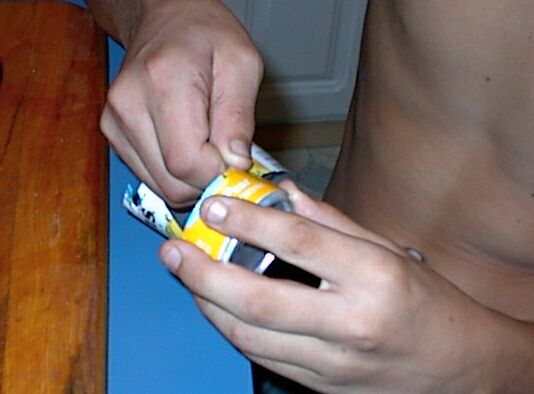
Cut the bottom off of the soda can at about 1/2", the method that I
have found work best is: place a small piece of plywood 1/2" thick on a
flat surface; hold the razor blade flat on the plywood with one corner
protruding about 1/4"; put the can on the flat surface and slide it over
until it just touches the corner of the razor blade; turn the can around
about 5 or 6 times, maintaining contact with the razor blade until you
have a deep scribe all the way around the can. With scissors, cut almost
down to the scribe. You should then be able to tear the can at the scribe
(I find that this gives a much smoother edge than cutting the can with
scissors or tin snips, and only takes a few minutes longer). Lightly sand
the edges to remove any burrs. This will be your priming cup and stove
base. Using the scissors, cut a 2" square piece from the remainder of the
soda can to use to mix the J-B Weld on.
Using the same method, cut the juice can without any holes off at 1-1/4".
Using the same method, cut the juice can with the hole in the bottom
off at 1".
|
|
|
|
|
|
|
|
|
|
|
|
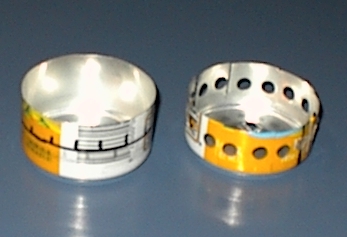
Take a small strip of paper about 1/2" thick and cut it so that it will
just fit around the juice cans, fold it in half four times so that you
have 16 creases in the paper use the pen to highlight the creases, this
will be a template for making the burner holes. Tape the ends together
making sure that it will fit around the can snugly.
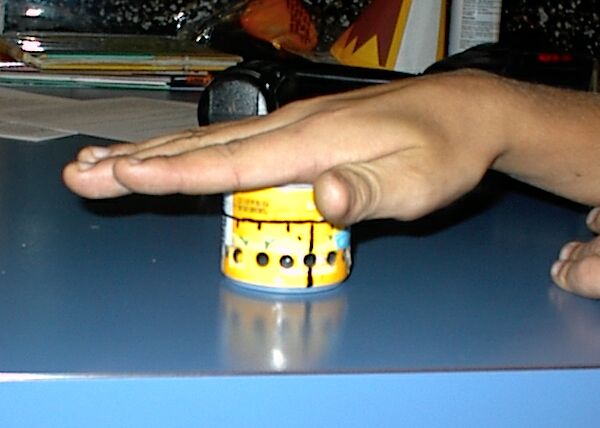
Using the marker, draw a line 3/8" above the base of the shorter can.
Put the paper template around the can and make a mark where the template
marks intersect the line around the can. Draw a straight line from the
point where the ends of the paper meet for the entire length of the can.
Using a hole punch or the 3/16" drill bit, drill or punch holes around
the can at each mark. Using the scissors, cut about 8 slits in the can
from your cut to the beginning of the curve at the can base.
Make a line around the taller can 3/8" below the cut (7/8" above the
base). Put the paper template around the can and make a mark where the
template marks intersect the line around the can. Draw a straight line
from the point where the ends of the paper meet for the entire length of
the can. Do not make any holes in the taller can at this point.
Using the sand paper and/or wire brush, roughen up the following areas:
the soda can inside bottom; the small ridge on the outside bottom of the
taller juice can; the inside of the taller juice can within about 1/2"
of the scribe cut; the shorter juice can about 1/4" above and below the
curve at the base. This will help the J-B Weld hold better.
Very gently, press a small dimple in the bottom of the soda can and
in the taller juice can. Make sure that the juice can will still sit on
the soda can without wobbling. This will give you a little more fuel volume
in the stove.
 |
 |
|
|
|
Put the taller juice can on your work surface, turn the shorter juice
can upside down and very carefully, place it inside the fuel tank (now
you see why you cut the 8 slits in the side of it). Make sure that the
longer lines you drew from the template line up. Gently press the shorter
juice can into the taller juice can until it is almost flush, keeping the
longer lines lined up. Turn the cans upside down on your work surface and
gently press down until the ridge on the inside can is flush with the scribe
cut on the outside can tank. This should leave a small valley between the
ridge of the burner can and the fuel tank.
Mix up a small amount of the J-B Weld on the small square left over
from the soda can (unless you like cookies, if you like cookies, mix the
J-B Weld on your wife favorite cookie pan, this will almost guarantee that
your wife will make cookies within a very short time, but then you'll have
to take a break to go buy her a new cookie pan and some flowers). Using
a toothpick, put a bead of the J-B Weld all the way around the valley between
the fuel tank and the burner, this will seal it and add some strength.
Attach the bottom of the taller juice can to the soda can using the J-B
Weld, make sure that it is centered so everything will be level.
Let the J-B Weld dry and set up, the J-B Weld instructions say overnight,
but I have noticed some flame from the J-B Weld if I don't give it at least
24 hours (I don't know if it affects the strength of the bond).
Make the burner ports, I have found it easiest to put the needle in
the drill and drill them at a very slow speed. Drill on hole at each of
the marks you made on the side of the taller juice can with the template.
These small holes should be going through the larger holes you put in the
shorter juice can.
 |
 |
|
|
|
 |
 |
|
|
|
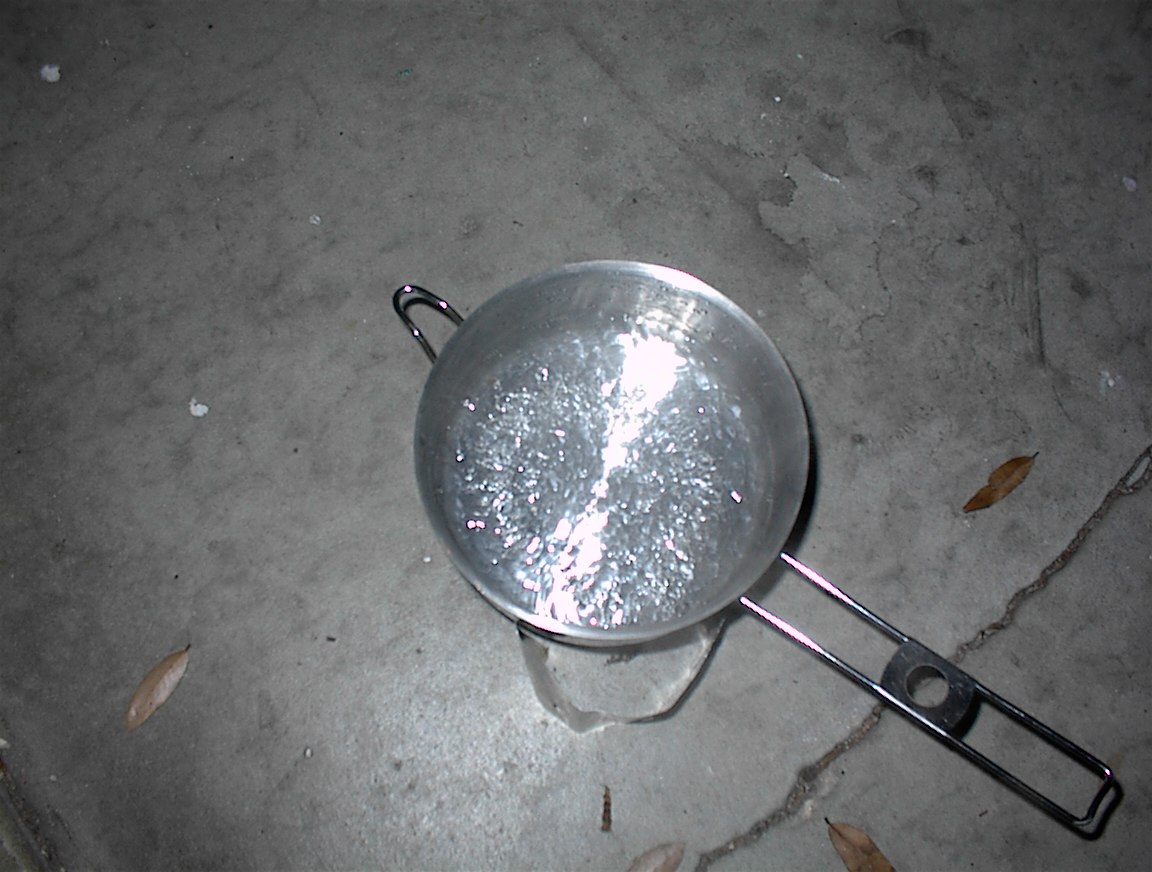
To use the stove, put 1 oz. (2 tablespoons) of alcohol in the stove
through the 3/16" hole in the top (I can usually get a boil using 3/4 oz.,
but only under ideal conditions, so use a full oz.). Put a little alcohol
in the primer cup. Put the pot on the stove to seal the top of the stove
so that it can become pressurized and then light the fuel in the primer
cup. After a few seconds the alcohol in the stove will begin to boil, creating
pressure and forcing alcohol fumes out of the burner ports. The alcohol
in the primer cup will burn off in a minute or two, but the stove will
continue to burn.
I haven't run any test for boiling time, efficiency or anything fancy
like that, it boils enough water to make a meal in a very reasonable amount
of time, weighs almost nothing (under half an ounce), takes up very little
pack room and that's good enough for us.
If you are not tight on space (don't need that plastic cup) make the
stove a little taller to increase the fuel capacity, I made one that is
1-1/2" tall for myself, put the burner holes 1/2" from the top, can get
an ounce of fuel in easily without "dimpling" the can bottoms. The extra
1/8" that the burner holes are from the pan seems to make it slightly more
efficient. It is smaller and lighter than most stoves, seems to be almost
as efficient, and will probably join me on quite a few trips in the near
future.